User Tools
Table of Contents
Zimbra Migration
Method 1: https://community.zextras.com/migrate-zimbra-from-one-server-to-another-server-method-1/
Method 2: https://community.zextras.com/migrate-zimbra-from-one-server-to-another-server-method-2/
Method 3: https://community.zextras.com/migrate-zimbra-from-one-server-to-another-server-method-3/
See also Zimbra Collaboration Server OSE
Migration Howto: https://community.zextras.com/zimbra-migration-with-zextras-backup
![]() Set the maximum message size on the Zimbra server before proceeding with any inbound migration to avoid problems.
Set the maximum message size on the Zimbra server before proceeding with any inbound migration to avoid problems.
Zextras Backup Migration
Read this entire page first: Migrate Using Zextras Backup
![]() If you are migrating from one Zimbra ZCS server to another, this is the way to go. It is fairly simple and very effective.
If you are migrating from one Zimbra ZCS server to another, this is the way to go. It is fairly simple and very effective.
- Accounts
- CoS
- Mail
- Calendar Items
- Briefcase Items
- Drive Items
- Preferences
- Etc.
Overview
- Ensure that Zextras Backup is installed on both the source and destination servers
- You can configure Zextras Backup on the destination server permanently
- Disable Zextras Backup Realtime Scanner on both servers
- Disable scheduled SmartScans on both servers
- Mount the backup media on the source server
- Set permissions to
zimbra:zimbra - Usually
/opt/zimbra/backup/zextras
- Run a Zextras Backup SmartScan backup on the old server
- Initializing Zextras Backup will run a SmartScan
- May take hours
- Do not run another Zextras Baackup (SmartScan) on the source server until you are ready for the final cutover
- Dismount the backup media from the source server
- Mount the backup media on the destination server
- Use a temporary mount point such as
/mnt/tmp - Reset the permissions to
zimbra:zimbra
- Start the restore
- Use multiple threads for a quicker restore
- May take days
- Dismount the backup media from the destination server
- Mount the migration backup media back on the source server
- Use exactly the same mount point previously used
- Reset the permissions to
zimbra:zimbra
- When you want to do the actual migration, stop mail flow on port 25
- Verify the mail has stopped flowing
- Incoming mail will be delayed
- Run another (final) SmartScan on the source server
- It won't take long as it's an incremental backup
- Dismount the migration backup media from the source server
- Mount the migration backup media on the destination server
- Use a temporary mount point such as
/mnt/tmp - Reset the permissions to
zimbra:zimbra
- Start the restore
- Use multiple threads for a quicker restore
- This restore will be much quicker
- May still take hours depending on how much mail has flowed since the first pass
- Dismount the migration backup media from the destination server
- Enable Zextras Backup Realtime Scanner on the destination server
- Enable scheduled SmartScans on the destination server
Restore
mkdir /mnt/tmp
chmod 777 /mnt/tmp/
mount -t nfs ip.of.nfs.svr:/path/to/backup /mnt/tmp/
chown -R zimbra:zimbra /mnt/tmp
su - zimbra
zxsuite backup doExternalRestore /mnt/tmp concurrent_accounts 5
Verify Proxy Settings
Check all domains:
for dom in $(zmprov gad); do zmprov gd $dom zimbraPublicServiceProtocol zimbraPublicServiceHostname zimbraPublicServicePort; done
Modify all domains:
for dom in $(zmprov gad); do zmprov md $dom zimbraPublicServiceProtocol https zimbraPublicServiceHostname zimbra.yourdomain.tld zimbraPublicServicePort 443; done
 Info below this point is old.
CLI
![]() Change to the
Change to the zimbra user for all commands:
su - zimbra
List the mailboxes to be exported:
zmprov gqu localhost | grep yourdomain.tld|awk {'print $1'}
or, for two domains:
zmprov gqu localhost | egrep 'yourdomain1.tld|yourdomain2.tld' | awk {'print $1'}
Count of the number of mailboxes to be exported:
zmprov gqu localhost | grep yourdomain.tld|awk {'print $1'} |wc -l
The following is an example script to export all mailboxes for one domain to a temporary location. Modify before using!:
- Host name
localhostis OK for single server installations
- Domain name
- The target domain you want to export all mailboxes for
- Zimbra server URL
- Omit
-uand referenced URL for single server
- Destination
/tmpshown- Check for free space first!
- Uncomment lines after editing and testing to begin the export
vim /tmp/export-domain-all.sh
#!/bin/bash
for i in `zmprov gqu localhost | grep yourdomain.tld | awk {'print $1'}`; do
    echo $i
#    file=`echo $i | awk -F '@' '{print $1}'`
#    /opt/zimbra/bin/zmmailbox -z -t 0 -m "${i}" getRestURL -u "https://hoster.domain.tld" "//?fmt=tgz" > /tmp/${file}.tgz
done
chmod +x /tmp/export-domain-all.sh
/tmp/export-domain-all.sh
Zimbra Migration Wizard
![]() You can run this GUI tool as an administrator for Exchange server to Zimbra server migrations as well as PST imports.
You can run this GUI tool as an administrator for Exchange server to Zimbra server migrations as well as PST imports.
![]() The PC you run it from must have Outlook and .NET Framework 4 installed. Windows 10 comes with .Net Framework installed.
The PC you run it from must have Outlook and .NET Framework 4 installed. Windows 10 comes with .Net Framework installed.
![]() You will need to know the location of your PST file to use this tool.
You will need to know the location of your PST file to use this tool.
As a Regular User
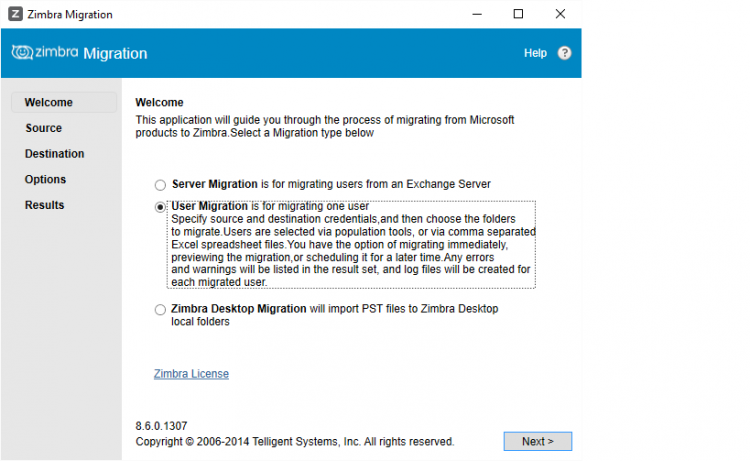
- Run the appropriate ZimbraMigration.exe to start the Wizard
- 32-bit or 64-bit
- Must match the Outlook installed
- Choose User Migration
- Next
- Click OK to select a
.pst(Outlook data) file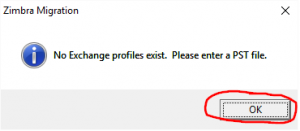
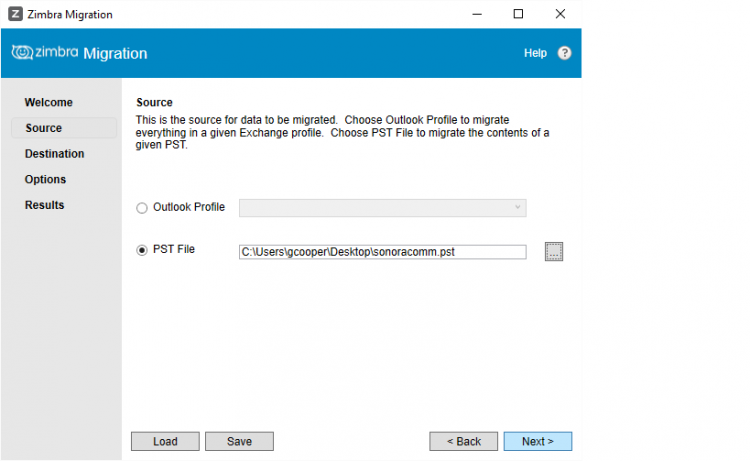
- Browse to and select a
.pstfile- Next
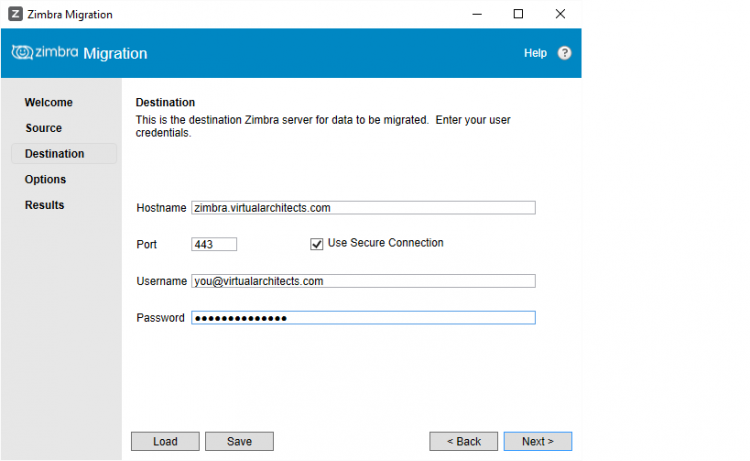
- Enter your Zimbra destination server and account details
- Hostname →
zimbra.virtualarchitects.com - Port →
443 - Use Secure Connection → Yes
- Username → Your e-mail address
- Password → Your Zimbra password
- Next
- Select the items and options for your migration
- Choose Skip previously migrated items
- Click Migrate
- Check Verbose Logging for detailed log of any errors


As an Administrator
Zimbra Admin → Tools and Migration → Download


Move Folders to Another Mailbox
See also Migrating to a New Mail Server
Merge Two Mailboxes: https://blog.grs.gr/language/en/how-to-merge-two-zimbra-mailboxes/
https://webhostinggeeks.com/howto/how-to-manage-mailbox-folder-using-zmmailbox-cli-in-zimbra/
su - zimbra
Export
# Entire account
zmmailbox -z -m user1@domain.tld getRestURL "//?fmt=tgz" > /tmp/user1.tgz
# Folder and subfolders
zmmailbox -z -m user1@domain.tld getRestURL -o /tmp/user1.tgz '//?fmt=tgz&query=under:"Folder Name"'
Import
resolve= parameter has several options:
skipignores duplicates of old items, it’s also the default conflict-resolution.modifychanges old items.resetwill delete the old subfolder (or entire mailbox if /).replacewill delete and re-enter items
![]()
Reset will be a bit faster on an empty destination mailbox because it skips most dupe checks.
zmlocalconfig socket_so_timeout
zmlocalconfig -e socket_so_timeout=3000000

# change it back when you complete the import(s)
zmlocalconfig -e socket_so_timeout=30000
zmlocalconfig --reload
Merge with Existing
zmmailbox -z -t 0 -m user2@domain.tld postRestURL "//?fmt=tgz&resolve=modify" /tmp/user1.tgz
Overwrite Existing
zmmailbox -z -t 0 -m user2@domain.tld postRestURL "//?fmt=tgz&resolve=reset" /tmp/user1.tgz
Outlook Import Wizard
![]() This tool appears to require Outlook 2010 (or older?) installed on the machine you are using to run the Migration Wizard.
This tool appears to require Outlook 2010 (or older?) installed on the machine you are using to run the Migration Wizard.
This tool allows for migration from Outlook (PST) to Zimbra.
Zimbra Admin → Tools and Migration → Download

From IMAP to Zimbra
See also Migrating to a New Mail Server
Migrate a Domain Off Your Server
http://www.mojocode.com/content/moving-domain-multi-domain-zimbra-server
Let's say you are migrating a domain off of your multi-domain Zimbra server, but you don't want to just delete the accounts immediately…
If you edit the domain status to closed, users can't log in and the server won't route mail for the domain…which is a problem. Users of other domains on that server will not be able to send mail to the 'closed' domain.
So, you can easily rename the domain and the server will then route mail normally to the migrated domain.
su - zimbra

zmprov --ldap rd mydomain.com mydomain-old.com
